DIY Braids for Easy Summer (and Autumn) Solutions to Bad Hair Days – and $45 Braid Bars!
One of my very fave sites for online ‘real girl’ fashion and beauty advice, Refinery 29, asked the question late last week about whether you would pay $45 for a braid that would last all weekend. And while I LOVE braids, and am quite thrilled they are back in style, when I took a look at the example given, I had to say NO WAY! Now, I don’t really have a problem supporting your local braid-maker if you have the extra cash (it’s certainly a creative, crafty way to make a living), but I figured I could do something just as interesting and maybe prettier, myself.
I spent the weekend in Vermont on a (much needed) break with one of my best friends, Cara Joy, a holistic health specialist, and so I was healed from my recent stress not only via the farmer’s market, mountain streams and green mountains of Stowe, Vermont (more on that over at Eco Chick Escapes), but also from my good friend’s amazing company. I had a good 24-hours (including all activities mentioned above) with this hairdo that cost me about 7-8 minutes to create and a bit of organic argan oil to tame frizzies. Here’s how I did it, with my very curly shoulder-blade length hair.
1. Brush well, and work in a bit of hair oil, pomade, or whatever will help your hair stick together a bit. Divide hair into three sections. One on each side of the face, and one in the back down by the nape of the neck (I parted my two front sections asymetrically because I like my part off-center as it’s more flattering to my face).
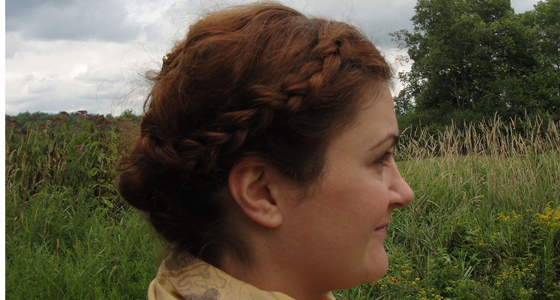
2. French braid the two side sections (not together!) – this sounds harder than it is, even if you’ve never French-braided before. As long as you know how to braid regularly, start off with just one ‘set’ of braid so that it’s begun but only one set of plaits is visible, then pick up the hair closest to your face and pull it into the closest 1/3 piece of unbraided hair. Braid once, then when the next piece comes around (without added hair), add unbraided hair, then again, repeating all the way down to behind your ear. (Here is a good description of French braiding techniques).
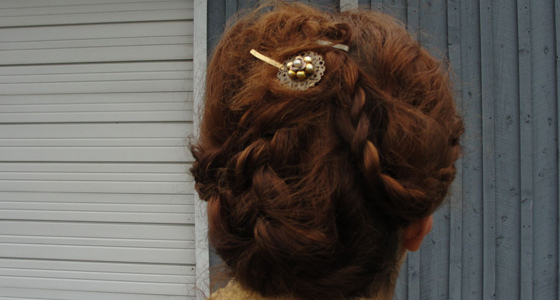
3. Do the same on the other side, French braiding to just behind the ear, then letting whatever length you have hang down, braided together, at the bottom. Fasten the bottoms if your braid will come apart without, while you braid the back (my hair is curly enough so it sticks together by itself here).
4. Braid a regular braid (not too tight) with your remaining hair in the back.
5. Flip the back braid upside down (up against your scalp to the top of your head) and pin to the hair at the crown of your head, and drape the other two side braids to join it, and clip with a pretty large bobby pin (I needed two).


